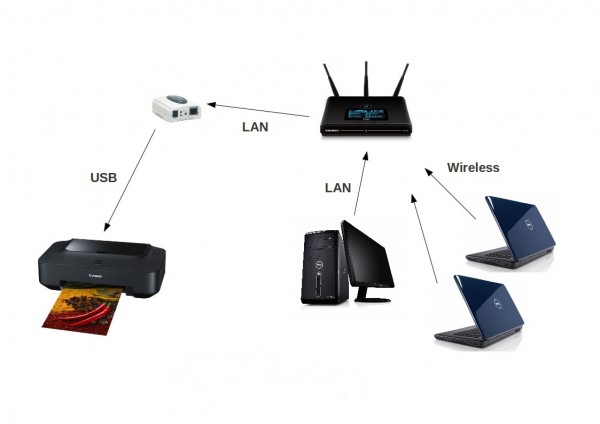
People often purchase more than one computer for different reasons; may be for business needs, educational needs or to just develop a small network at home. With multiple computers or laptops networked together at home or in an office, it is not out of question to print documents from any computer in the network. The ordinary norm that a printer must be directly connected to a particular computer through a USB cable in order to access printing options is outweighed when it comes to computer internet networks.
Computers in the same network share some common features and accessibility options. For instance, a user can share one printer attached to one machine with all other machines in the network (not out of the network). The network is the only thing that makes sharing possible. The steps below will shade light on how to ensure that there is fine communication between a single printer and the computers in a network:
Step 1: Click on the start menu and choose control panel then to view devices and printers.
Step 2: Choose the ‘Add a printer’ option at the top of the window. From the display window that appears, choose add a network, select either Bluetooth or wireless printer accordingly.
Step 3: Settle down for a few minutes as Windows scans your local area network to identify the printer that has been made available for sharing. From the list that appears, choose the printer that you want to access and click ‘Next.
Step 4: Wait for Windows to connect to the printer and locate the printer drivers. Confirm that you want to connect the printer so that drivers will now be installed in your computer. A pop up display will confirm to you that the printer has successfully connected to your computer. Print a test page if need be or click ‘Finish’ to start using the printer.
Step 5: Now that your printer has been connected to one computer, switch on the sharing option so that you’ll be able to print from any PC in the network. Go back to the control panel and click on ‘internet and network’. Select network and sharing center then ‘Change advanced sharing settings’.
Step 6: Turn on printer sharing option and save changes. Close the window and go back to the Control panel. View devices and printers and click on the printer you want shared.
Step 7: Choose printer properties and click sharing. Tick the box next to ‘Share this printer’ and click OK. The printer can now be used by all PCs in the network.


Comments