 Since we are living in a world where technology is really important, we do need to make sure that we have an app installed for anything we do on a computer in order to increase our productivity. The same thing goes to the ability of taking screenshots. However, since there are a plethora of applications that allow you to do this, it can be really hard to choose one. Also, if you choose to install many of them, you’ll just end up slowing down your computer, and that’s not recommended.
Step 1. Learn About Free Online Screenshot
Fortunately, there is a solution even for those people that don’t want to install an application or which want only a single app installed on their Mac, and that is Free Online Screenshot, a tool that you can find at http://screenshot.net/. This particular application was specifically designed to help you take screenshots at any given time from the comfort of your desktop.
Step 2. Make Screenshots
This tool is very easy to use, you just have to go to the website and press the “Take Screenshot” button. That action will start opening the application. Keep in mind though that you need to provide permissions for the applications if you want it to run, as it’s developed using Java. After you agree with the permissions, the application will be launched automatically.

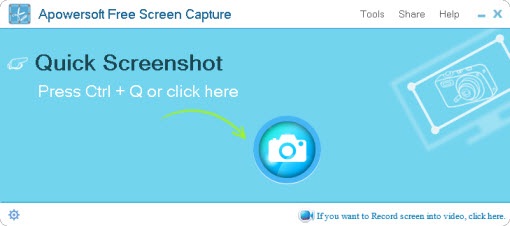
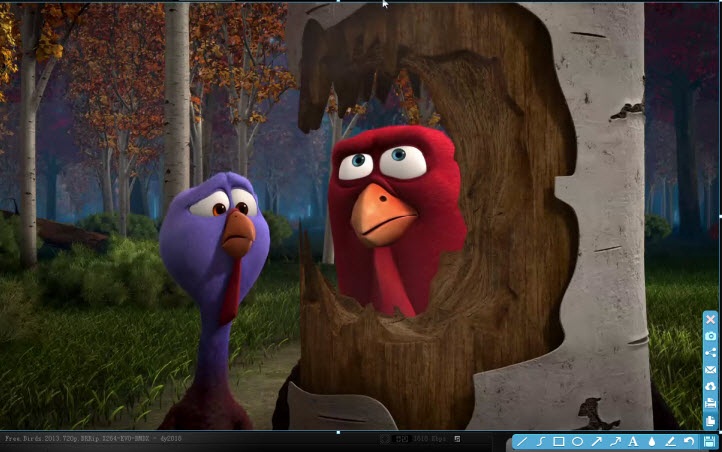
One the starter interface, simple click in “Quick Screen” pane or press “Ctrl + Q” on keyboard, you will activate the screenshot mode, and then you can use the hair-cross to drag a region for creating screenshot.

What makes this application really special is surely the fact that it automatically detects windows and can take a snapshot of their content immediately. In order to do so, just make sure the window is on the top of all others, hover your mouse on it, and then you can click to grab the screenshot.
Tips: If you’re not satisfied with the screenshot, just hit “Esc” to try again. Also, if you need to take screenshot on browser, you may also learn how to capture webpage screenshot.
Step 3. Edit and Save Screenshots
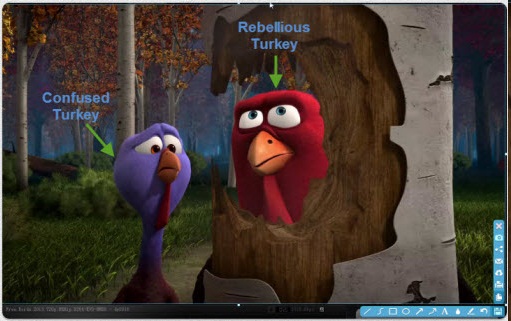
Despite the essential capture function, it also brings you the ability to annotate or edit images before you actually save them, which can prove to be really helpful in those situations when you want to add your personal touch to any images.

Right after you have confirmed the creation of a screenshot, you will see vertical and horizontal bars on the right-bottom. You can use such options to draw lines, shapes and arrows on current screenshot directly. You may also add text to comment the image with personalized font and size. What’s more, you can use “highlight” or “blur” to mark a spot. When you have finished editing on taken snapshot, just hit the “disc” icon on vertical toolbar to save it to local drive.
Step 4. Upload and Share Screenshots
There’re also uploading and sharing options for people who want to preserve their images on web server for easy management or delivering them to others.
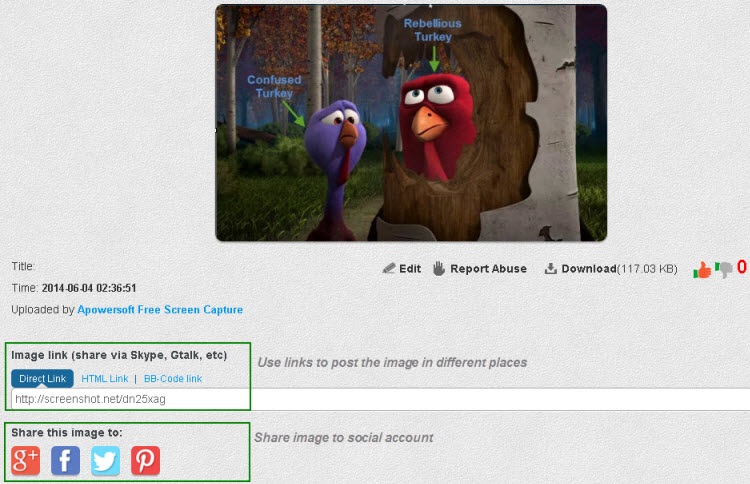
After taking a screenshot, besides the editing options, you will also see an “Upload” icon on vertical toolbar. By clicking on it, you will agree to store the current illustration onto the free Cloud space provided by screenshot.net. And you may set title and password to set restriction on viewers.
Wait a short while till the process completes and you will be taken to the webpage with your image on it. Now you can feel free to share the link to anyone in the way you like. You can also find quick share buttons on the image’s webpage and just need to hit a button to share the stuff in your social network.

Tips: There’s another method to share your screenshot in faster way. After you finish taking and editing a screenshot, look for the “Share” icon on horizontal toolbar. By clicking that icon, you will be given options to share stuff via Google+, Twitter, Facebook and Pinterest. Just select a social channel and you will forward to the login page with a link to your image (it will be uploaded to Cloud space automatically).


Comments