
Of late their was an incidence where a person lost a whole five hours work that was located on a spreadsheet as a result of a saving malfunction on Microsoft Excel. This can be very disheartening and the user can become totally discouraged as they would either repeat the work or give up on it completely. The situation necessitated the victim to get a permanent solution. The person was able to initiate a perfect and brilliant idea that works out well after testing it.
Drop box was introduced to curtail the problem by saving all the files for a time period of thirty days including those that had already been deleted. Drop box works perfectly with it’s the automatic save function that is available on the operating system.
The Drop box allows the user to open up old files and recover lost and deleted documents with ease. For instance, if the Automatic default recovery system is set at a time span of one minute interval then the user can be sure of getting their documents if the system is well integrated with Drop box.
Connecting Drop box to Microsoft Office
They are certain steps involved in achieving this. These include the following;
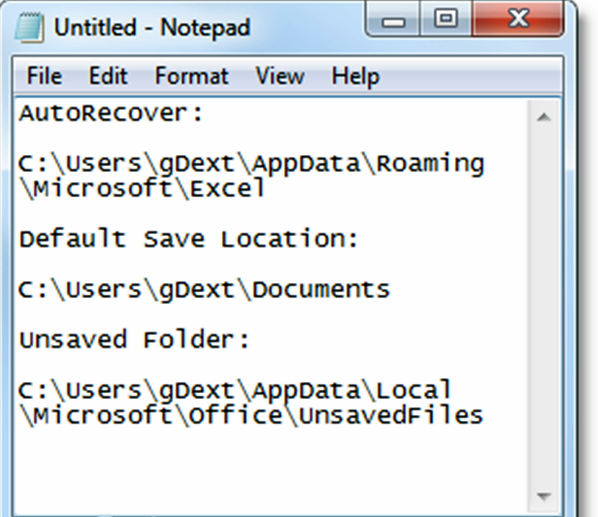
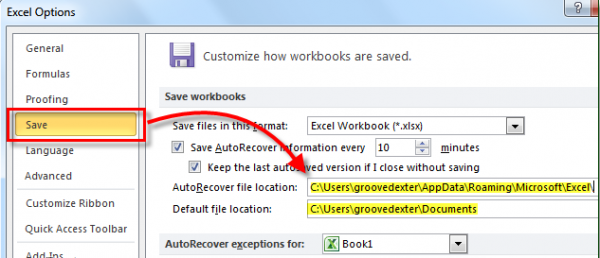
1. Locate the main storage of the documents. There are mainly three sections which are
- Auto Recover save location
- Default file section
- Unsaved Documents section
Once you detect the locations note them down so that you can remember. Copy and paste is also another option that can help you remember.
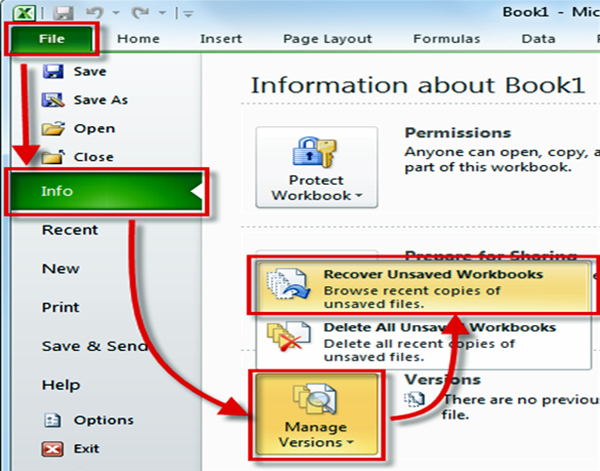
2. For the UN saved work the location is different than that of the saved work. With the office 2010 version the unsaved work can be located on the File, information key, the click manage types and then recover unsaved work.
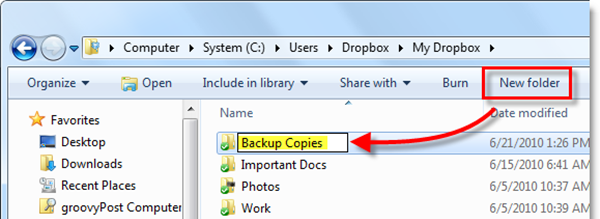
Proceed and come up with the folder in Drop Box.
3. Then simply proceed to My Drop box and select to create a new folder which is referred to us the Backup Copies.
4. Now open up the command prompt.

5. While in the command mode use the mklink/d to come up with a symbol ink link that will direct you to the saved files. Drop box will only give back up to files and folder located within it.
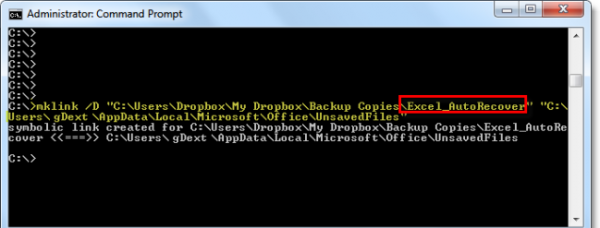
6. Ensure that you perform the operation repeatedly for all the folders by simply coming up with a new Symlink.
7. Once you accomplish the process simply open the Drop box website account to ensure that all files are fine.
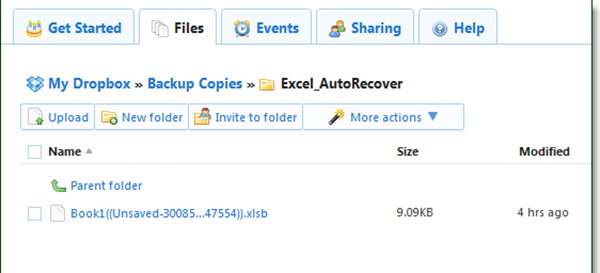
8. Note that Dropbox saves the data for a period of thirty days even if the auto save function is erased.
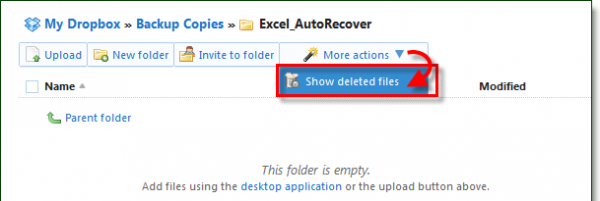
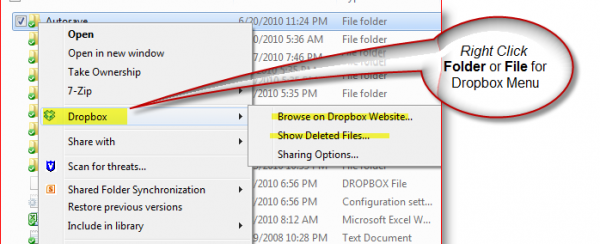
9. Drop box goes further to keep a history of all the files that have been deleted.
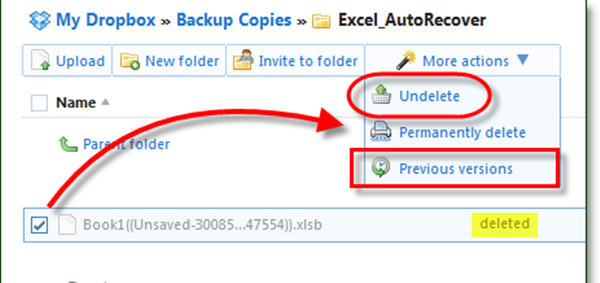
Simply click on the right of the file or the folder and you will commence the process.
With Drop box you can feel comfortable as you go on with your work as all the data is safe and secure.


Comments